Valentine's Day Banner
Hello again, friends! Valentine's Day is around the corner, and this year I decided to make a fun and festive banner with hearts. It is very easy to make one of these, and I used normal things I had laying around my house which kept me from visiting a craft store. If you want to make one of these, you should try it! It is fun, and the end result is worth the effort.
The materials and supplies needed for this are:
- scissors
- exacto knife
- cutting board
- pencil
- paper
- cardboard
- iron
- ironing board
- starch for ironing (optional)
- craft paint
- paintbrush
- paper plate for paint
- burlap
- craft twine
- assorted ribbon
- sewing machine
- thread for sewing machine
To start this project, I ironed my burlap and starched it to keep the fibers down and the fabric stiff. I found my burlap balled up in the bottom of my craft closet, so it was very wrinkled and needed a good ironing to be workable for this project.
I then eye-balled what size I wanted each piece of burlap to be, and cut out a piece. That piece became my pattern piece, and I used it to measure and cut out the rest of the pieces for my banner. The number of pieces of burlap you need depends on how long you want the banner to be, so it will vary from person to person.
Next you take the piece of paper and fold it in half. Use the pencil to draw half of a heart on the fold line, and cut it out with scissors. Make sure the heart will fit inside of the banner piece with a little room to spare. Use the paper with the heart-shaped hole to draw a heart on the cardboard, and cut the cardboard with the exacto knife in the shape of the heart. Make sure you cut on top of your cutting board, because the knife is crazy-sharp and will damage whatever is underneath the cardboard as you are slicing.
The cardboard with the heart cut-out is now your stencil. Center the heart on each burlap piece and paint. The burlap has lots of space between its fibers, so make sure you have a scrap piece of paper under the burlap as you are painting. It will be messy. :) I chose to paint pink and cream hearts, but any color combination will be nice. It takes a while for the paint to dry, so have a drying space set up. I laid out some of my kids' construction paper for them to dry on.
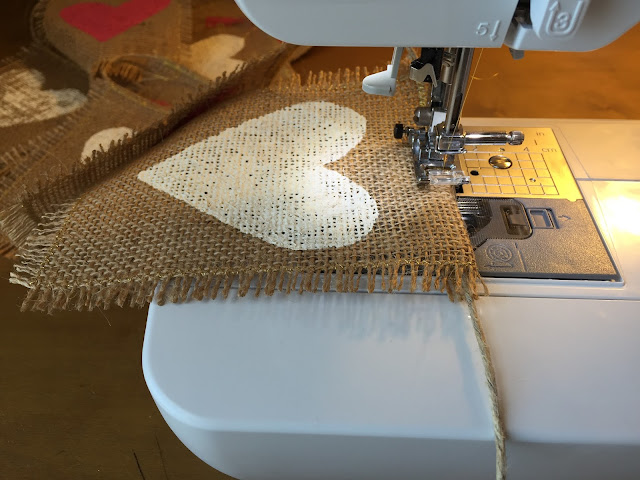
After all the burlap pieces are dry, remove a few rows of the burlap strings on the sides and bottom. I like the frayed, shabby look it gives the banner. Do not remove any of the fibers from the top, since you need the space for sewing it to the craft twine. I decided to sew around the edges with a large zigzag stitch to keep it from further fraying, but this step is not necessary.
Stack up your pretty little pile of burlap hearts in the order you want them on the banner, and find your craft twine.
To sew the burlap piece to the twine, place the twine underneath the burlap piece, and fold the top of the burlap over just enough to cover the twine. If you look at it from the side it will be a little twine sandwich with burlap, twine, burlap. Now you can sew these three layers together with a large, spaced out zigzag stitch. After finishing one, leave a little space on the twine before sewing down another piece of burlap. I think I left about 2 1/2 inches between each piece. Again, just eye-ball it to see what you think looks best.
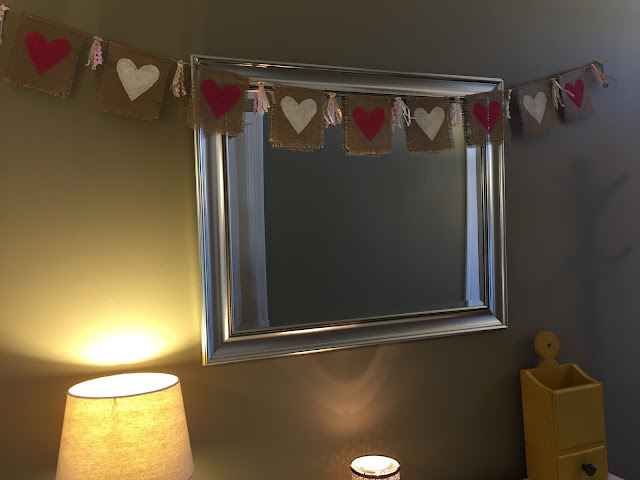
After you sew all the pieces of burlap on that your heart desires, find some fun ribbon to tie between the hearts. I found some fun cream colored lace ribbon, gold ribbon, and pink ric rac in my ribbon box to use on this project. I love to save ribbons from gift bags, so I have quite the stash saved up to choose from for my projects.
I love the fun shabby-chic feel this banner has to it. It's a little scrappy, literally, since I used scraps for it, and that's what makes it so fun. It doesn't have to be perfect. I think imperfections add character to projects.
For the final step, find a place to hang your new banner!
I love making fun decorations for holidays. It adds a fun personal touch to my home, and it is a one-of-a-kind creation. Truly unique.
Have a lovely day, and let me know if you make one of these! Do you have any fun Valentine's Day crafts you like to do?
-Bridget :)


Comments
Post a Comment